


Creating AI anime art can start with something as simple as choosing a model, describing the character or scene you want, and generating an image. But as you experiment, you’ll come across tools that give you more ways to shape the result. Things like LoRAs will let you add specific characters or styles, and various settings will change how the image is generated.
Some platforms bring many of these options together in one place. PixAI, for example, combines anime models, LoRAs, generation, editing, and other creative tools within the same workspace. Other platforms let you set up the workflow item by item based on what you want to achieve.
- AI models and checkpoints
- The model and checkpoint are the starting point for understanding how an AI image workflow is put together.
- What is an AI image model?
- What is a checkpoint?
- How do you choose an anime model?
- Prompts and how they control the image
- LoRAs and Styles: How they influence the result
- AI anime artwork generation settings you may need
- Reference images, ControlNet, and image-to-image/video tools
- Putting the tools together into an anime workflow
- Which AI anime art tools do you actually need?
This guide explains what the main AI anime art tools actually do, when you might use them, and how they fit together. You can start with the basics and explore the more advanced options as your projects become more ambitious.
AI models and checkpoints
The model and checkpoint are the starting point for understanding how an AI image workflow is put together.
What is an AI image model?
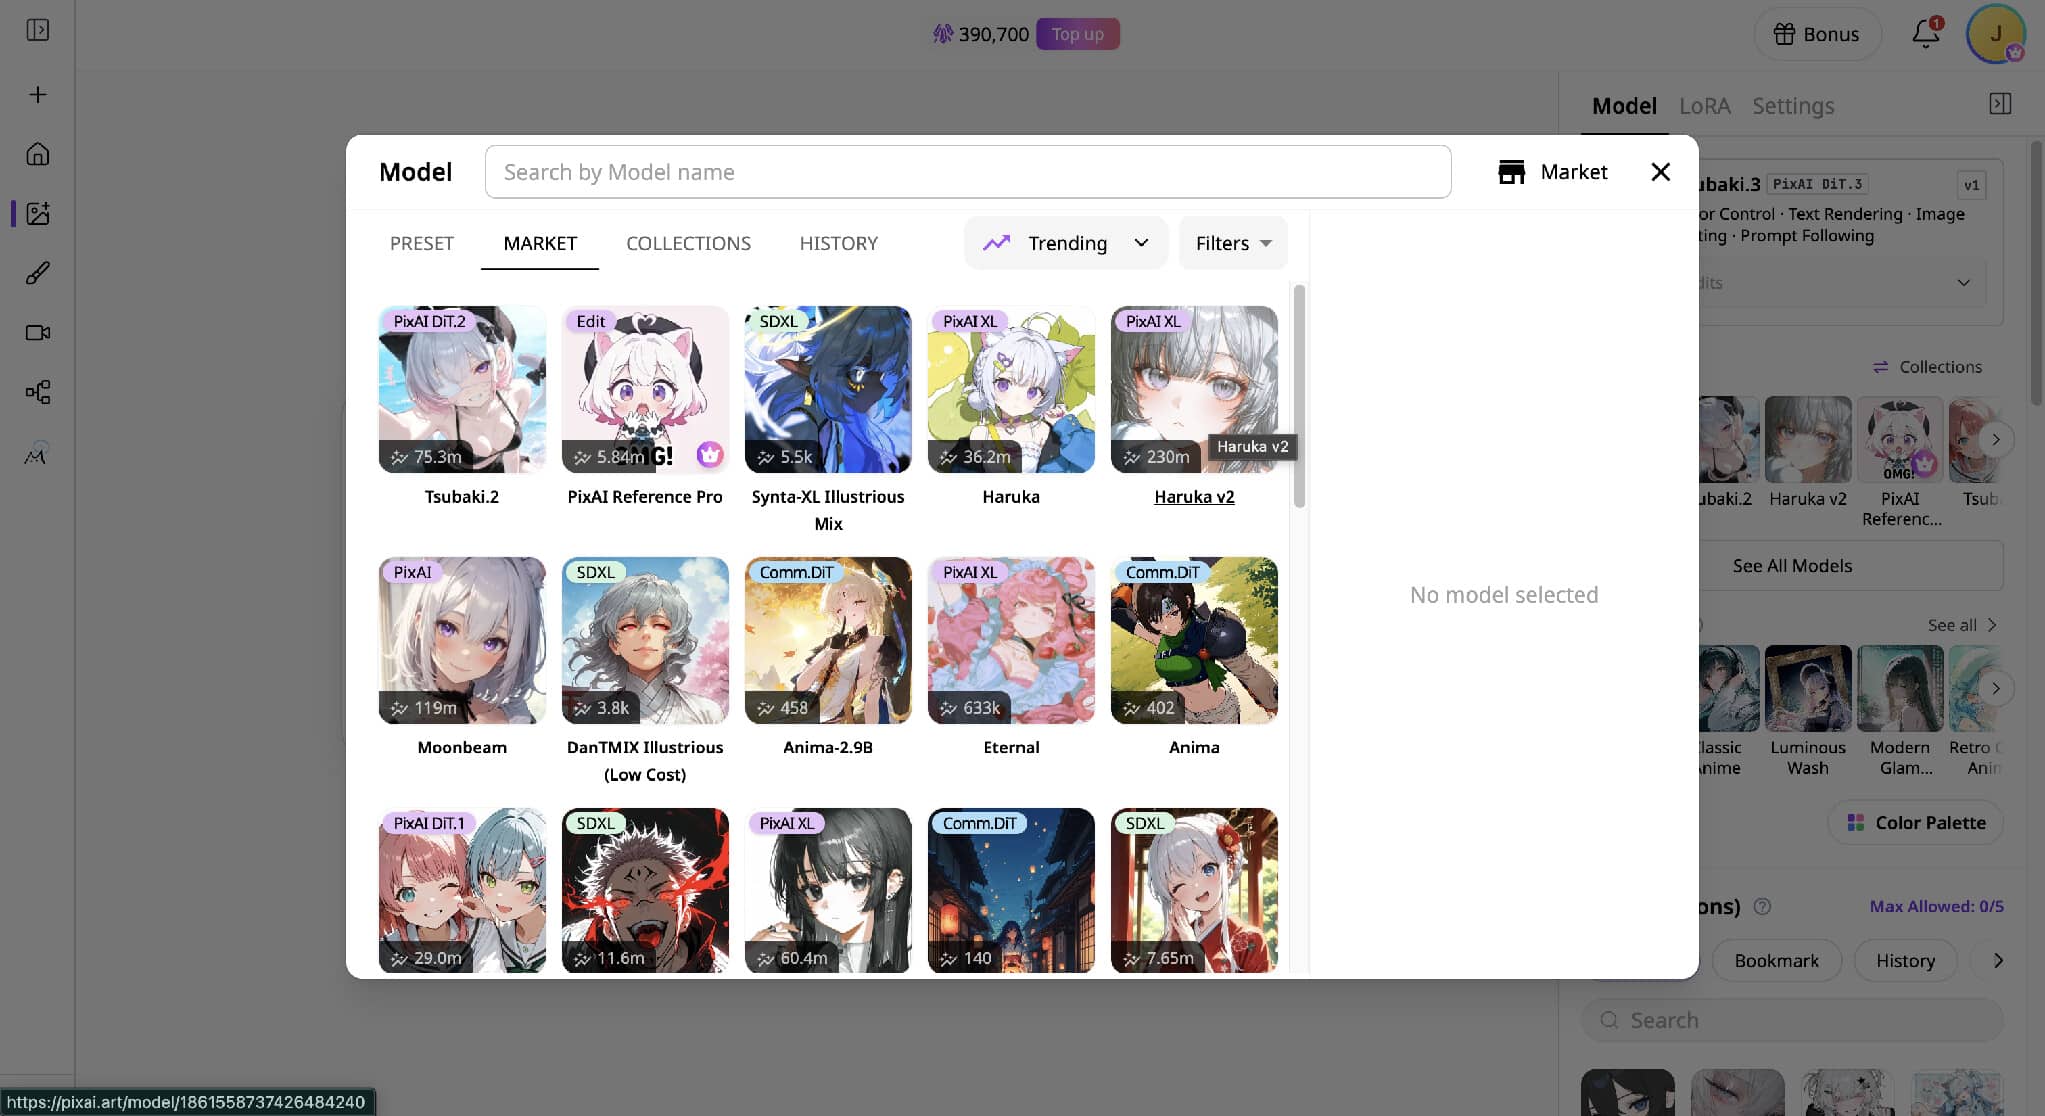
An AI image model is the part of the system that has learned how visual concepts can be turned into images. It has learned patterns relating to things such as characters, clothing, lighting, composition, and artistic styles, then uses those patterns to interpret your instructions and build an image.
When creating AI anime art, the choice of model makes a noticeable difference in the aesthetics. It also affects the workflow, as some models focus on working well with natural-language prompting, while others focus on a particular aesthetic.
Basically, the model provides the visual foundation. Your prompt tells it what you want to create, but the model influences how that request is interpreted and rendered.
What is a checkpoint?
A checkpoint is a saved set of model weights that can be loaded into an image-generation system. In a local workflow, it is typically a multi-GB file, often stored in .safetensors format. It contains the main model used to generate your images.
For example, a Stable Diffusion setup might have several checkpoints on its SSD, each suited to a different visual style. You can switch between them depending on the type of anime artwork you want to create.
On a cloud platform such as PixAI, you generally interact with the model through the platform rather than managing the checkpoint file yourself. That means the technical work of storing and loading the underlying model happens behind the interface.
How do you choose an anime model?
Choose the model based on the kind of artwork you want to create and the workflow you plan to use. Some models are better suited to particular anime aesthetics, while others are designed around different prompting methods, character handling, or generation controls.
For example, PixAI’s Tsubaki.2 is built around natural-language prompting and supports complex character scenes, while Haruka v2 is an SDXL model with a more traditional anime-oriented workflow. Reference Pro takes a different approach, using reference images to guide the generation rather than relying on the same set of controls as a conventional text-to-image model.
Prompts and how they control the image
Once you have a model, the prompt is the main way you communicate what you want it to create. The same model can produce very different results depending on how you describe the character, scene, or visual style.
What is an AI image prompt?
An AI image prompt is the text you give an image model to guide the generation. It can describe the subject, appearance, clothing, pose, environment, lighting, composition, and other visual details you want to see.
The prompt does not function like a precise blueprint. The model interprets the information based on what it has learned, so changing a word, adding a detail, or reordering the description can significantly alter the resulting image.
How anime prompts are structured
Many anime-focused models work well with short, descriptive tags rather than long sentences. A useful structure is to move from the main subject to the details that shape the scene: character and appearance, clothing, pose, environment, lighting, and style.
For example:
1girl, solo, long silver hair, violet eyes, red ribbon, white fantasy dress, holding a lantern, ancient forest path, glowing fireflies, moonlight, detailed background, soft cinematic lighting
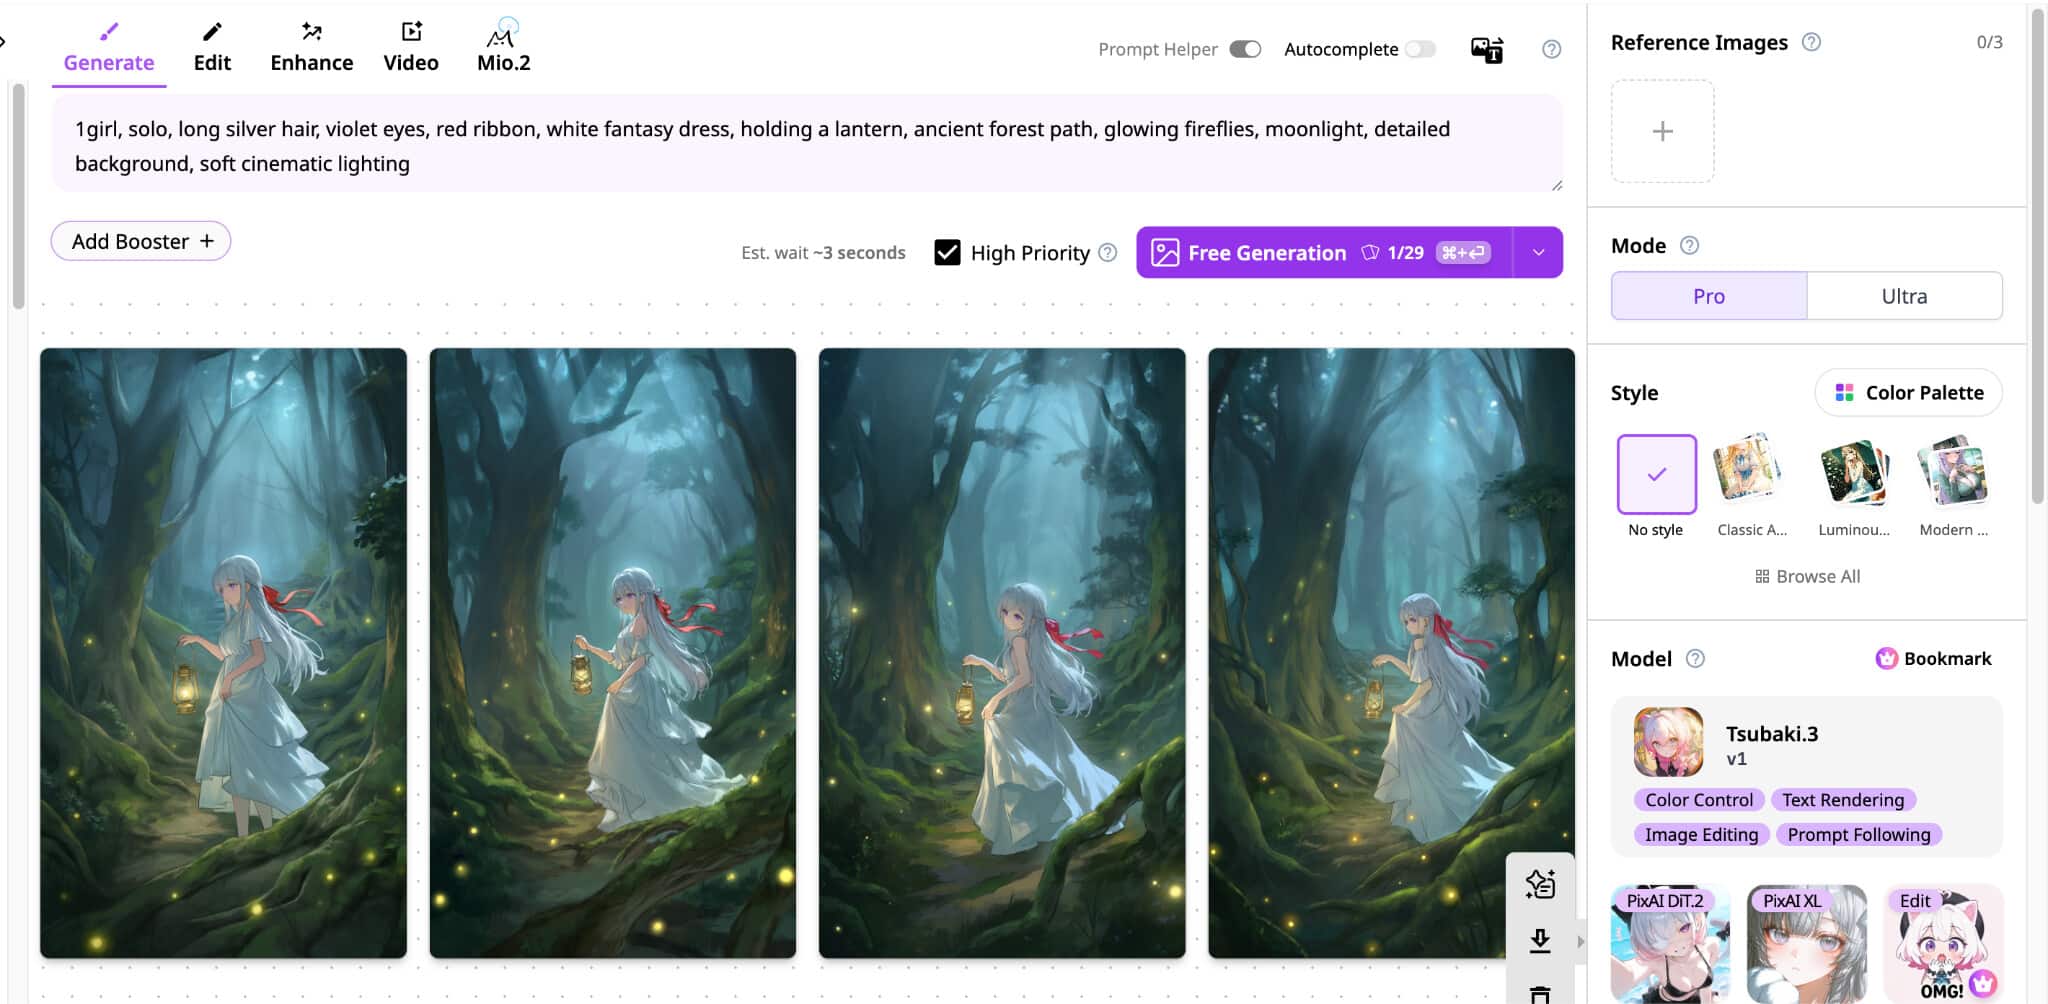
This approach makes it easier to see which part of the prompt is responsible for each element and to change individual details during later generations.
Some models also support prompt weighting, such as (white cardigan:1.2), which gives a particular concept more emphasis. The exact syntax and behavior depend on the model and generation interface.
Positive and negative prompts
A positive prompt is basically the description you give an AI model of what you want it to generate.
But to improve the result and minimize errors, you can also add a negative prompt. It’s usually placed in a separate section and provides additional instructions on what you want the AI model to avoid. Things like extra fingers, incorrect text, or low resolution. PixAI automatically includes a negative prompt, but you can also draft your own.
LoRAs and Styles: How they influence the result
While the base model will bring the main visual foundation, you can add other components when you achieve more specific results. In most cases, these are LoRAs and Styles.
What is a LoRA?
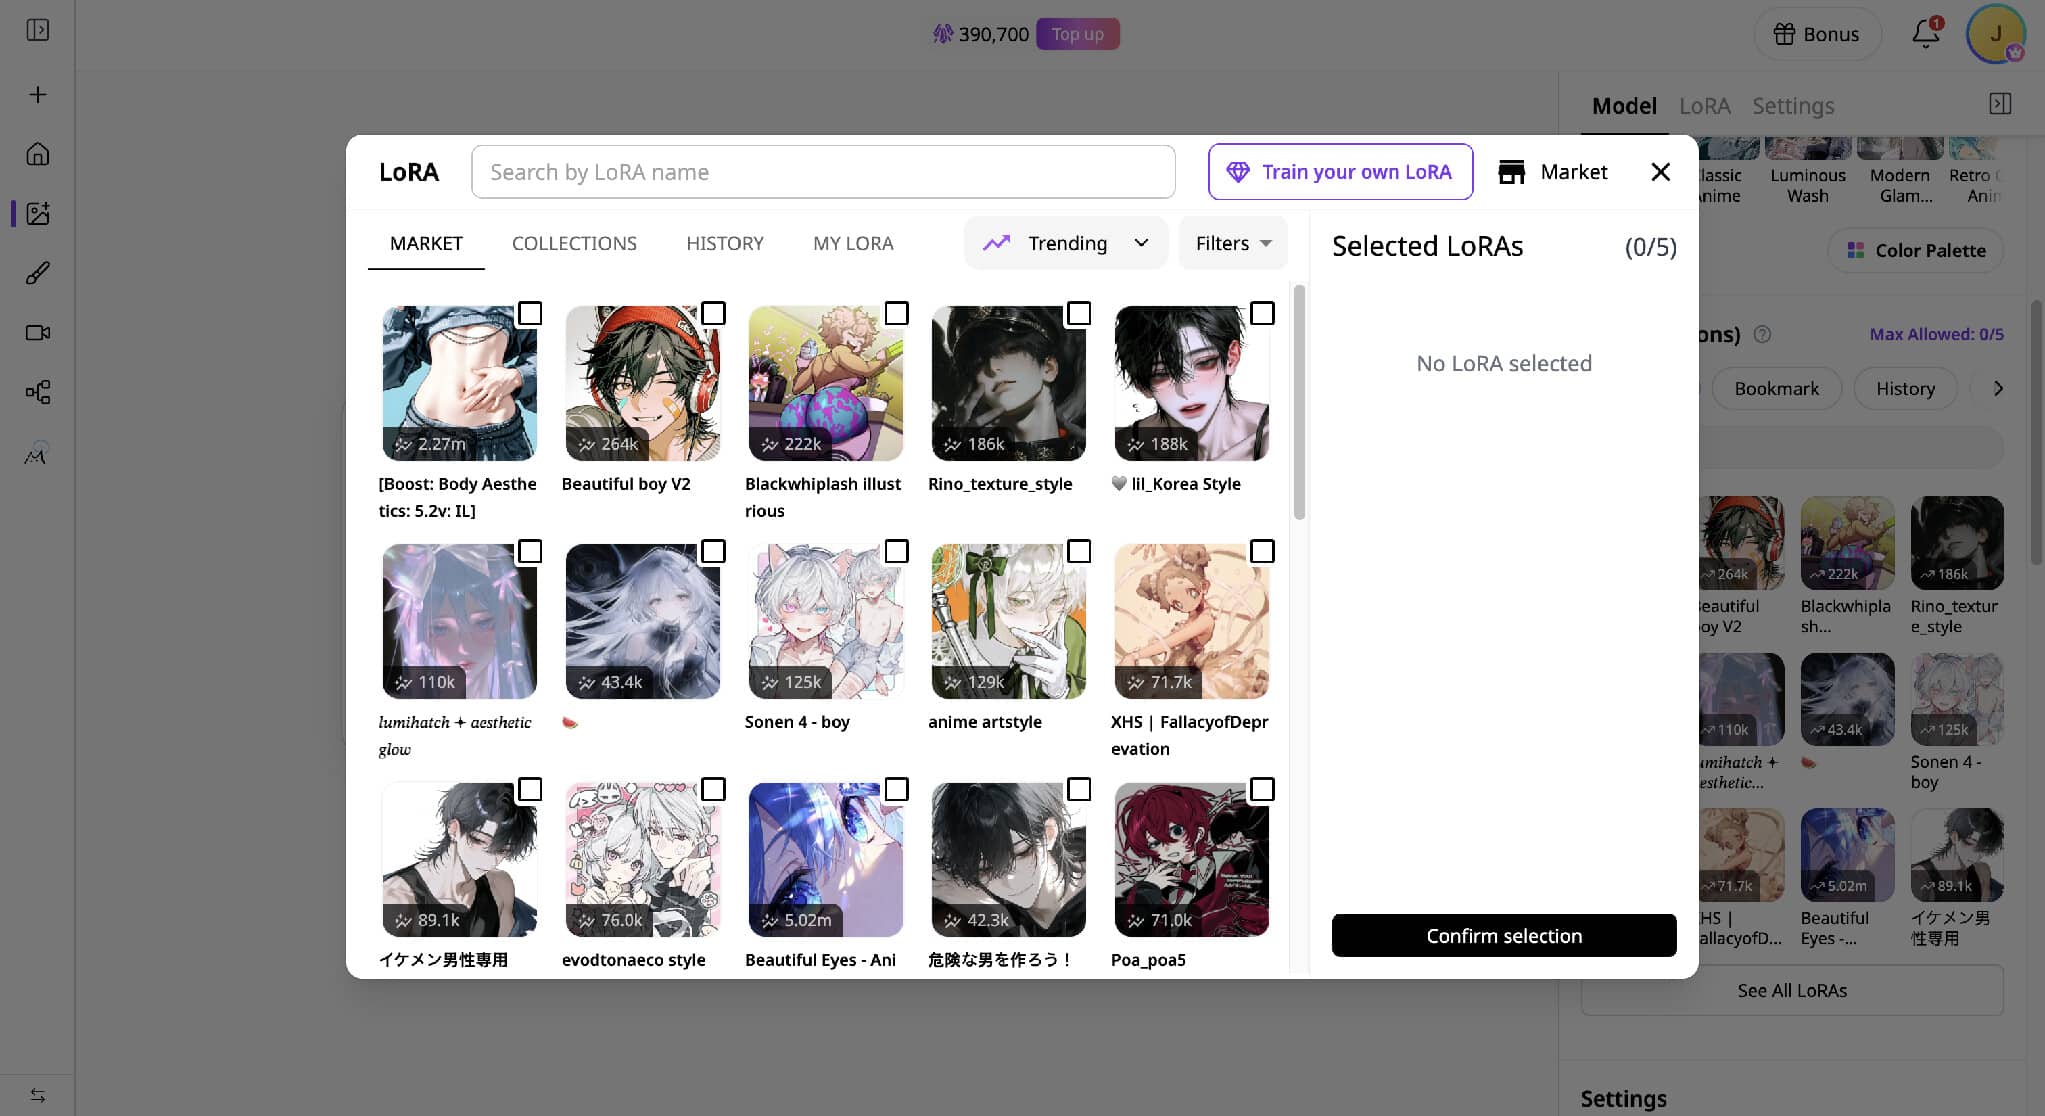
A LoRA, short for Low-Rank Adaptation, is a small model add-on that modifies how a compatible base model generates images. Rather than replacing the checkpoint, it works alongside it to introduce a more specific visual influence. That might mean teaching the model a particular character, outfit, visual style, or other distinctive trait.
A LoRA is much smaller than a typical checkpoint. The size often ranges from tens to a few hundred MBs, which makes it practical to combine with a larger base model.
In a local workflow, LoRAs are commonly stored as .safetensors files and loaded alongside the checkpoint. In PixAI, compatible LoRAs can be selected within the generation workflow, so the underlying file management is automatic. You can also train your own LoRA on PixAI and combine multiple compatible LoRAs in a generation.
How LoRA weights work
The LoRA weight determines how strongly that add-on influences the generation. A lower weight gives the base model more influence, while a higher weight makes the LoRA’s learned characteristics more prominent.
A value around 0.6–0.8 often works well for many LoRAs, but there is no universal setting.
What are Styles?
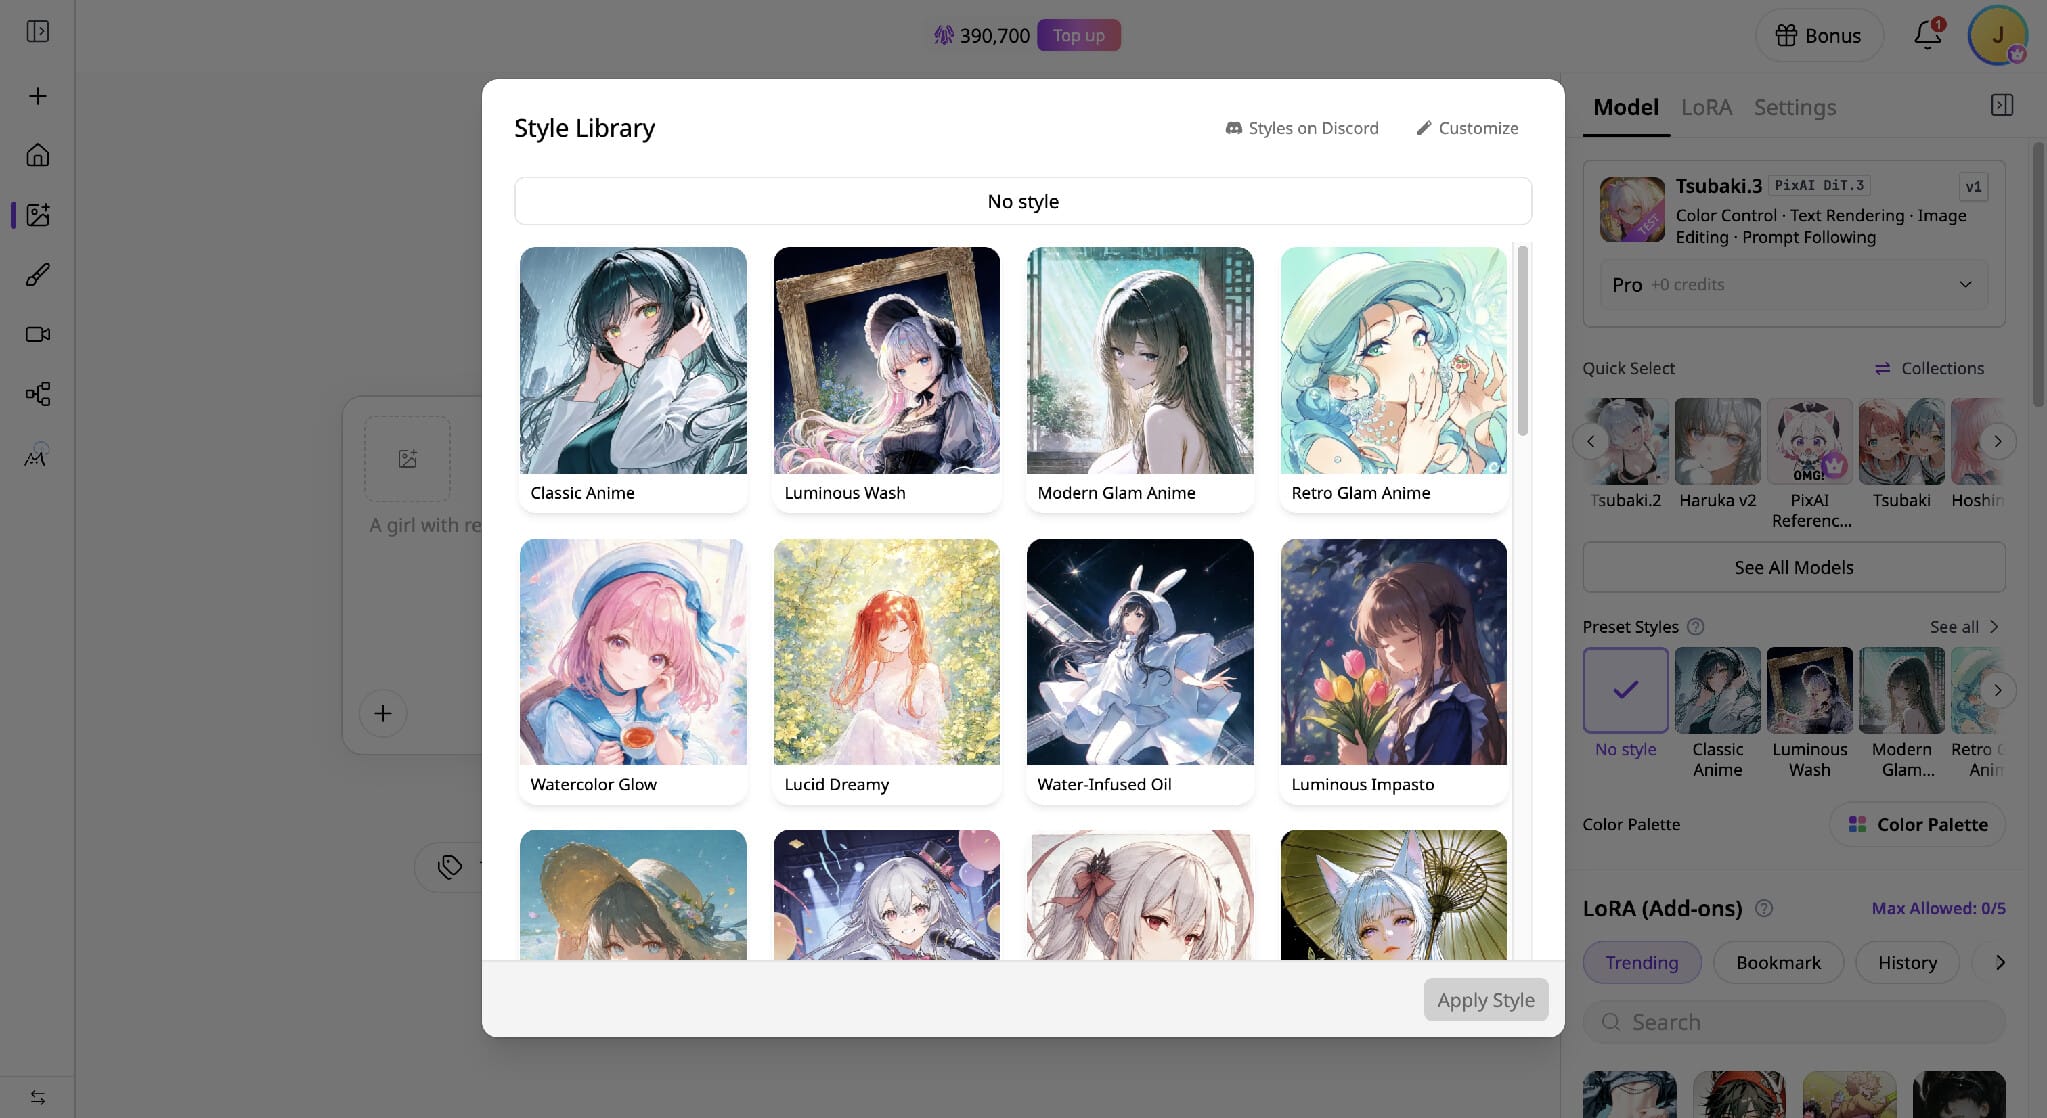
A Style is a higher-level way to apply a particular visual treatment to your AI anime artwork. Instead of manually adjusting several elements to achieve a certain look, a Style can provide a ready-made aesthetic that you can apply as part of the generation workflow.
In PixAI, Styles are designed to make visual direction easier to apply, while LoRAs provide more targeted influence over the generation. A Style might be useful when you want an overall aesthetic, while a LoRA is more useful when you want to introduce a specific character, outfit, style, or other learned trait.
AI anime artwork generation settings you may need
Once you have chosen a model and decided what you want to create, the generation settings let you fine-tune how that image is produced. You do not need to understand every control at once. A useful approach is to know what each setting changes, then adjust it when you have a specific reason to do so.
Resolution and aspect ratio
Resolution determines the dimensions of the generated image, while aspect ratio determines its shape.
The choice should follow what you are creating. A portrait ratio such as 3:4 works well for a single character, while wider formats are more suitable for scenes where the environment needs more space. Ideally, choose based on what you want to portray and where you want to share the images or videos.
Sampling steps
Sampling steps control how many iterations the generation process uses to turn the initial noise (random pixel variations) into an image. More steps give the process more opportunities to refine the result, but they also increase generation time and do not automatically produce a better image.
Around 20–30 steps is a practical starting range for many workflows.
CFG scale
CFG scale, short for Classifier-Free Guidance, controls how strongly the generation follows the text prompt. A lower value gives the model more freedom to interpret the request, while a higher value pushes it more strongly toward the prompt.
A range around 6–7 can be a useful starting point for many Stable Diffusion workflows, although the best value depends on the model. Pushing CFG too high can produce unnatural results.
Reference images, ControlNet, and image-to-image/video tools
Besides text prompts, you can also start from an existing image, provide visual references, control the structure of a new composition, or take a finished illustration into video. These tools become especially useful when you want to preserve something from an existing image while changing another part of it.
Image-to-image generation
Image-to-image generation uses an existing image as the starting point for a new one, alongside a prompt. Instead of creating everything from noise, the model takes information from the source image and transforms it according to your instructions.
This can be useful for creating variations, developing a sketch into finished artwork, or keeping a composition while changing its visual treatment.
When using this technique, keep an eye on the denoising strength. It determines how much freedom the model has to change the source. Lower values preserve more of the original image, while higher values allow a more substantial transformation.
Image-to-video generation
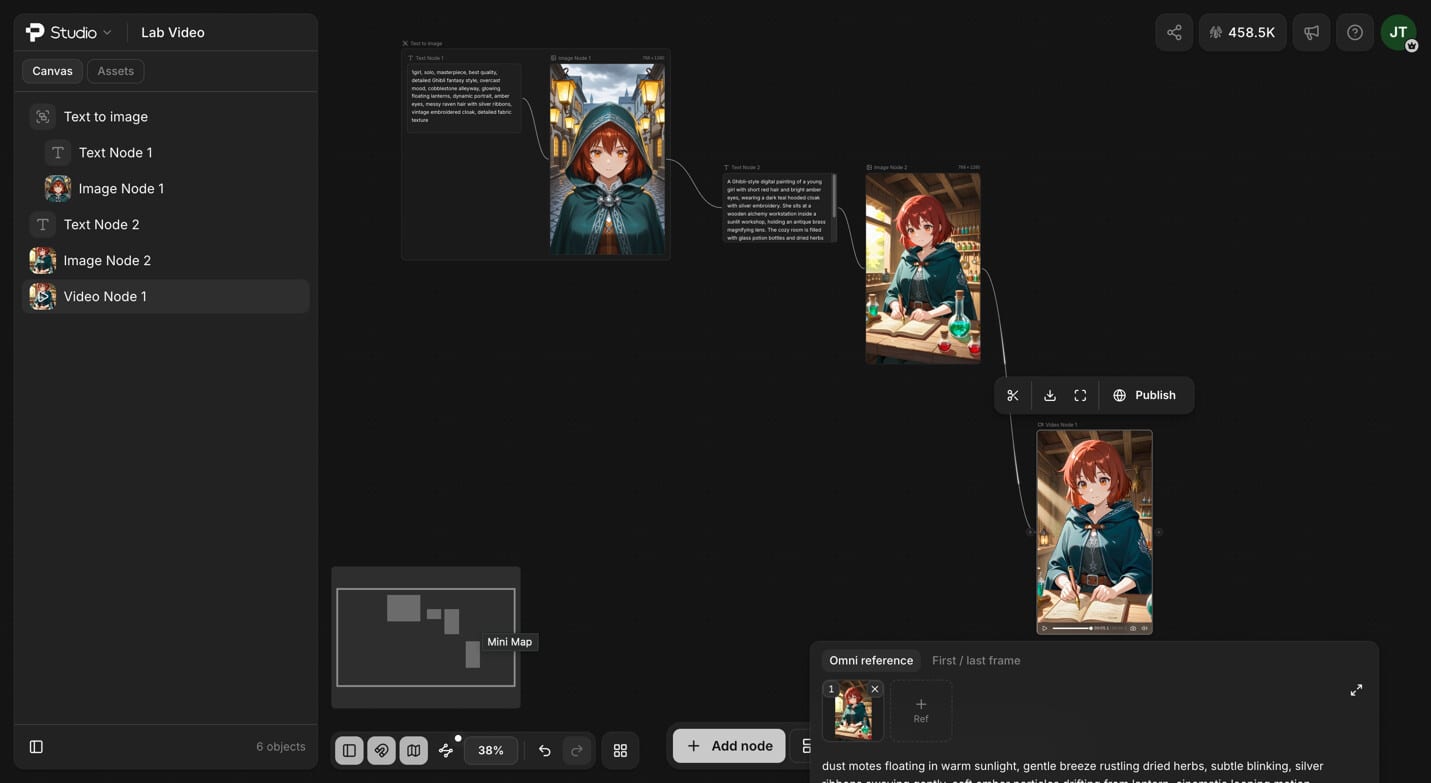
Image-to-video takes a still image and generates a moving sequence from it. This is a great way to turn a finished character illustration into a short clip with movement such as hair motion, blinking, character movement, or camera motion.
PixAI provides image-to-video tools that can work from generated artwork, making video a continuation of the image workflow rather than requiring the creator to start a separate project. If the workflow involves several elements, you can move it to PixAI Studio to take advantage of the node-based approach.
Inpainting
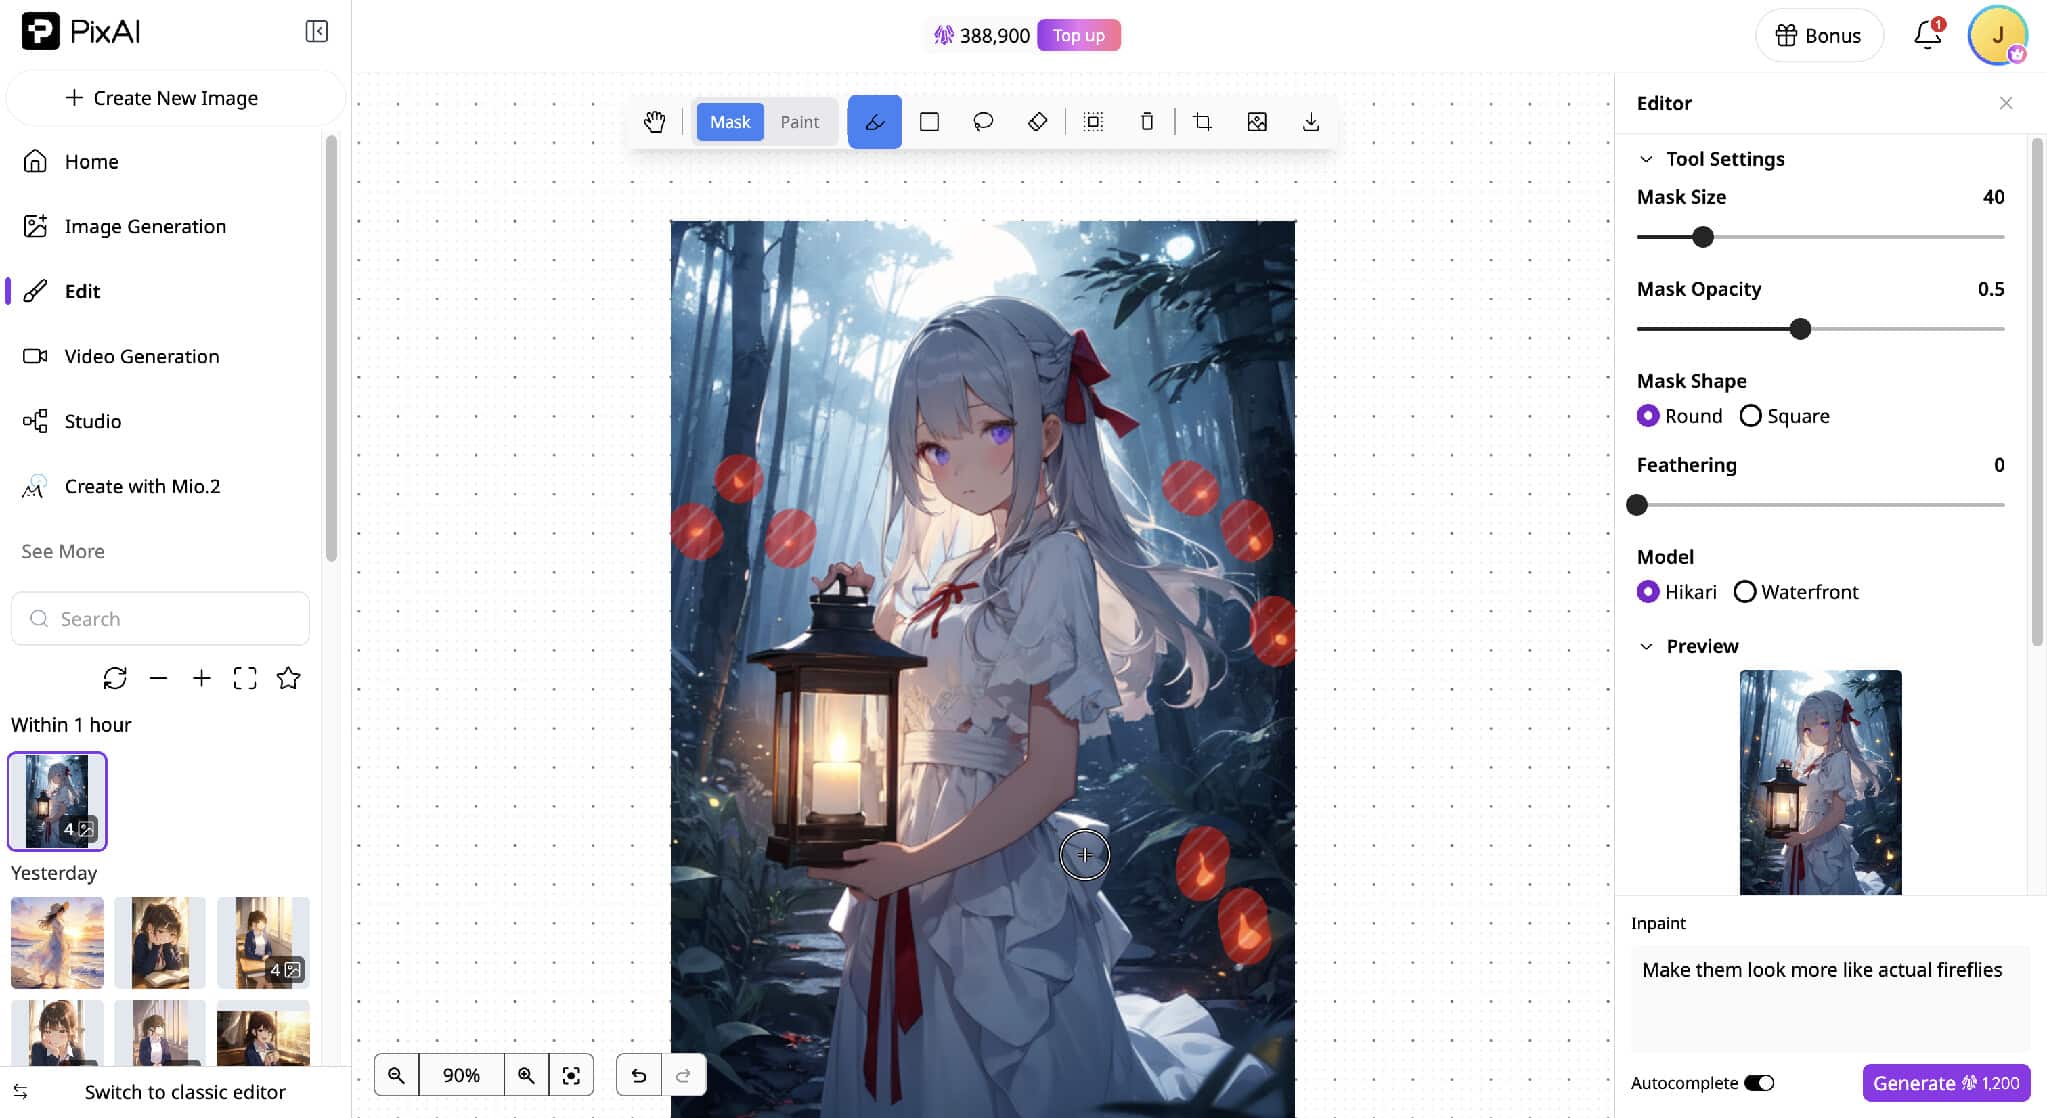
Inpainting lets you regenerate a selected area of an existing image while leaving the rest of the artwork intact. You typically create a mask over the part you want to change, then provide instructions for what should appear there.
This makes it useful for targeted fixes. You might correct a hand, change a character’s expression, replace an item of clothing, or remove an unwanted object without regenerating the entire image.
ControlNet
ControlNet provides additional structural guidance to an AI image-generation model. Instead of relying only on the prompt, you can give the model information about the pose, edges, depth, or other aspects of the desired composition.
OpenPose, one of its models, can help reproduce a particular body position, while Canny or Lineart can help guide the generation from an existing drawing or line structure. This makes ControlNet particularly useful when you know how you want the image to be composed but want the model to handle the final anime rendering.
Putting the tools together into an anime workflow
These tools work best as parts of a single creative process rather than as separate features you need to master. You might choose a model, write a prompt, add a LoRA for a specific character or style, and generate several variations. From there, you can use inpainting or image-to-image to refine the strongest result, then upscale it or turn it into a short video.
The exact combination depends on the project. Start with the simplest tools that solve the problem in front of you, then add more control when you need it.
Which AI anime art tools do you actually need?
You can create good anime artwork without using every tool in the AI image-generation toolbox. The right setup depends on how much control you want and what you are trying to create.
The basics
For a straightforward workflow, you need an image generator, a suitable anime model, a prompt, and a few basic generation settings. A platform such as PixAI brings these pieces together, so you can start generating without separately managing model files or building a local setup.
When you want more control
Once you want to develop specific characters or refine individual parts of an image, tools such as LoRAs, inpainting, and image-to-image become useful. They give you more ways to influence the result without rebuilding the entire image from scratch.
When you want to build advanced workflows
More complex projects can benefit from tools such as ControlNet, custom LoRAs, multiple compatible models, and automated workflows. Local setups can give experienced creators more freedom to combine these components, while platforms such as PixAI can provide many advanced capabilities within a more managed environment.
You don’t need every tool to get started
AI anime workflows can become as technical as you want them to be, but you can create a finished character without touching most of the advanced tools we’ve covered. PixAI is useful here because it brings the essential pieces together in one environment. You can choose an anime model, write a prompt, add a LoRA when you need one, generate variations, and refine the result with editing tools.
As your projects become more demanding, you can introduce tools such as inpainting, ControlNet, or image-to-video. Each one solves a particular problem, so there is no need to learn them all in advance. Start with the model and prompt, see what the image needs, and add another tool when it gives you a useful way to improve the result.