I’ve calibrated dozens of home-theater displays, and the quickest way to improve performance is to calibrate it. They aren’t esoteric service-menu tweaks; they’re stock controls that manufacturers tend to crank up for the purposes of showroom shock. With just a few minutes’ worth of adjustments, you can bring forth genuine detail, restore proper color and uncover shadow-and-highlight nuance the way it was meant to be seen (and broadcast).
Dial Back Artificial Sharpness for Truer Detail
Counterintuitively, the sharpness control does not add real resolution. It is an edge-enhancement filter that can increase contrast at boundaries, producing halos and the grainy noise that blurs fine textures. Imaging pros and pro calibrators often dial sharpness down to or near the neutral zero point in order not to exacerbate ringing; the Society of Motion Picture and Television Engineers has long warned that too much sharpening can gloss over actual detail.

Try it with a clean 4K nature shot or on-screen text and decrease sharpness until halos around leaves or letters disappear. That is often on many TVs between 0 and 10 out of 100. What you actually see, then, depends on the source and panel, not a single filter.
Disable Aggressive Motion Smoothing for Films and TV
Motion smoothing adds what are called synthetic frames to 24-frames-per-second film in order to transform it into 60 or 120 Hz (Hertz) video. That can dial down motion blur, but it also squashes cinematic cadence into the “soap opera effect” and often introduces artifacts around fast-moving objects. It’s usually on by default and is called things like TruMotion (LG), Auto Motion Plus (Samsung) and Motionflow or CineMotion (Sony).
It turns these processes off to keep the original intent of creators, and big studios support that approach through the UHD Alliance’s Filmmaker Mode. For movies and prestige TV, turn off smoothing altogether. For sports, a low “de-blur” setting can be useful to track the ball without slaying realism. Keep judder at 0 for movies and blur low for games or sports, if your TV breaks it into “judder” and “blur.”
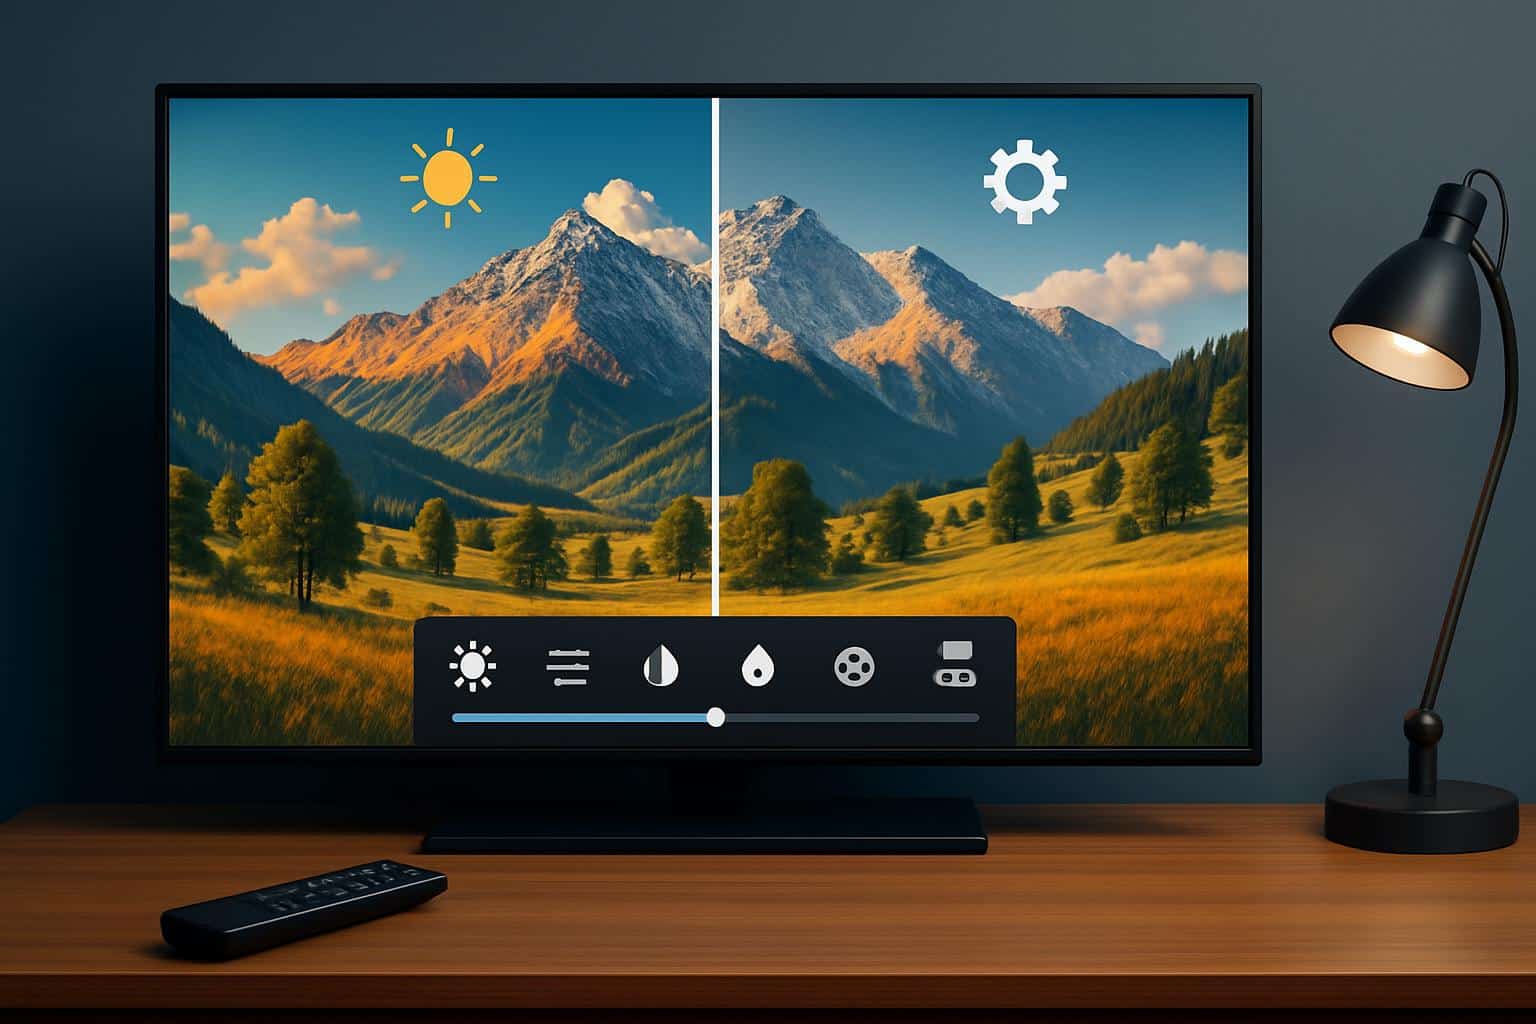
Escape Vivid Mode, and Choose the Right Preset
Retail floors are bright, so manufacturers ship sets in punchy presets like Vivid or Dynamic — modes that oversaturate colors, crush detail and push blue-tinted whites. Those two modes are consistently the least accurate, according to consumer testing organizations. At home, opt for Movie, Cinema or Filmmaker Mode for more faithful grayscale and color as well as a warmer D65-referenced white point (used in mastering).
If your room is sunlit, Standard can be an acceptable middle ground, but stay away from Vivid. Game Mode will usually disable intensive video processing and gamers should enable it. In-lab measurements from the likes of RTINGS have revealed input lag falls off a cliff — typically from 60–80 ms down to less than 20 ms — without doing anything meaningful to damage picture accuracy.
Correctly Set Black Level or Screen Brightness
On most TVs, “Brightness” adjusts what is called the black level (shadow floor) of the picture, not the light output of the panel. Set it too high and blacks lighten to generic gray; set it too low and near-black detail disappears. Load a scene with deep shadows and low-contrast textures (dark jackets, star fields, night cityscapes) and increase brightness until the lowest levels of detail just barely emerge from blackness — then stop.
If you have a test pattern from a calibration disc (Spears & Munsil) or an app, tweak the control until the bars just above reference black start to become visible.
Note that owners of OLED sets should be aware that some brands label overall luminance as “OLED Light” or “Backlight,” while many LCDs reserve those terms for panel intensity and use “Brightness” to refer to black level. In moderately bright rooms, boost the backlight, not the black level, to minimize glare without elevating shadows.
Contrast Settings for Highlight Detail Balance
Contrast is what determines how white whites will be. Push it too high and clouds, faces and snow clip into amorphous blobs; slip it down too low and the image falls flat. Grab a shot with strong highlights — sunlit clouds, say, or a white jersey under stadium lights — and crank contrast until the brightest areas are glowing but still contain texture. Back off when secondary elements begin to vanish.
For a dark room in standard dynamic range, common standards include ITU BT.1886; the target for reference video calls for about 100 nits peak brightness, which is generally a moderate contrast setting on consumer sets. With HDR, keep tone mapping and peak brightness controls at their default or recommended value as the TV’s metadata handling takes care of highlight roll-off more than the simple contrast slider in SDR.
Why These Five Fixes Deliver Better TV Picture Quality
Every tweak strips away image processing adulterating the visuals and exposes the fundamentals — correct grayscale, correct gamma, detail retained. Industry groups such as the UHD Alliance, the BBC and SMPTE recommend mastering-aligned viewing, and these settings just move your TV closer to that baseline without any special equipment.
The real-world payoff is easily visible in exactly what you gain: skin tones stop looking like they have a sunburn, shadows appear with texture not mush, bright highlights return detail and motion looks normal instead of just freaky. Spend 10 minutes on these five controls, and your TV will look incredibly close to what the director, colorist and broadcast engineers signed off on — no new hardware necessary.